Simple Homemade Fly Trap | DIY Project that Works!
Flies are just buggy; these annoying little pests buzz in and around your house and backyard… and bother just about everybody. Plus, let’s not forget how they torment your farm animals.
Learning how to make this easy homemade trap for flies is a great way to take care of these little buggers! The best part is that you probably already have most of the necessary items for this project at home!
Simple Homemade Fly Trap
Let’s get straight to it: this is an easy and safe way to trap flies in your home, yard, barn, and chicken coop. Hot summer weather attracts a lot of flies. They can be a real problem in your chicken coop, buzzing around the windows and crawling on the walls, creating a mess! Flies are a nuisance for any home.
That’s why you should try this DIY fly trap! Like many of you, we avoid using pesticides or harmful chemicals because they can be dangerous for you, your pets, and your plants. This simple project helps you get rid of flies the old-fashioned way with a DIY trap. Plus, it’s a great way to recycle a plastic bottle!
This simple trap can attract flies within minutes. You’ll get rid of these annoying pests in just a few days! This takes only about 10 minutes to make, so it’s worth the time to catch flies! There are many ways to make a fly trap, but this is the easiest one I’ve found!
Supplies: mostly household items
- Materials Needed:
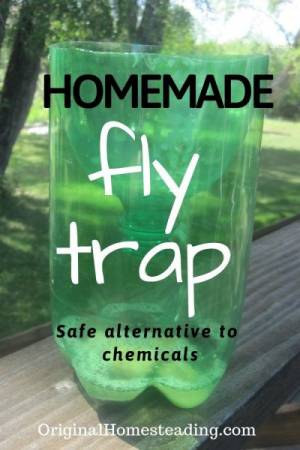
- An empty 2-liter plastic bottle. A green bottle helps hide flies.
- A sharp knife to poke a small hole in the bottle.
- Scissors or a serrated knife to cut the bottle.
- Packaging tape, if necessary.
- Sweet bait like overripe bananas or pears.
- 1/2 to 1 cup of water.
- A few drops of liquid dish soap.
If you do not have any overripe fruit at home, check to see if your local grocery store might give you some overripe bananas or bruised apples. Or, just place some banana slices into a plastic bag or mason jar and leave them on your kitchen counter for a day or two to ripen. This will make great bait!
Instructions:
Here’s what you need to do:
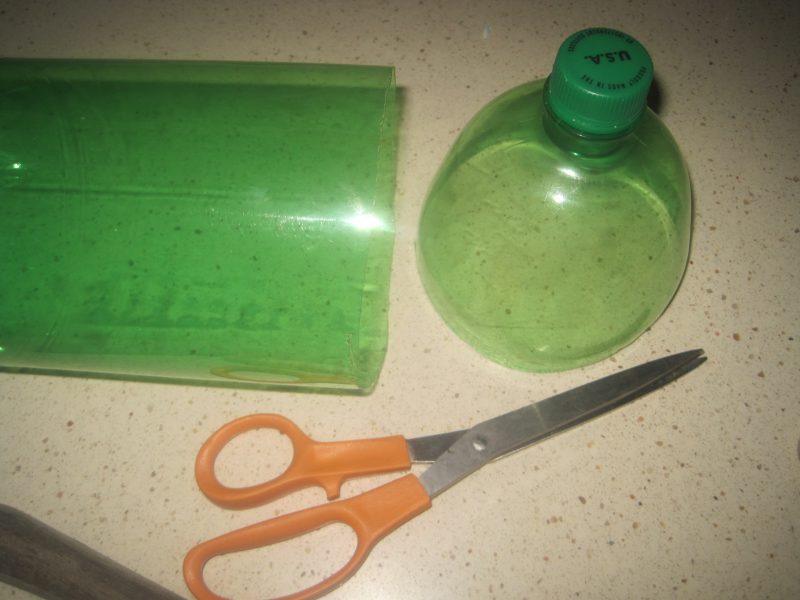
- First, thoroughly clean your bottle to make sure it has no residue left behind.
- Cut your bottle into two sections; the bottom half must be bigger than the top half. I cut it about 5 inches from the top.
- Keep the top screwed on the bottle to make it easier to poke the starting hole in the bottle without squishing it! The air inside the bottle helps the bottle hold its shape while making the slit in the side.
- Once you have poked a small hole or made a slit in the side of the bottle, cut the bottle into 2 pieces using scissors or a serrated knife.
- Pour your bait, water, and dish soap mixture into the bottom of the container. Make sure to pour the mixture into the bottom half of the bottle.
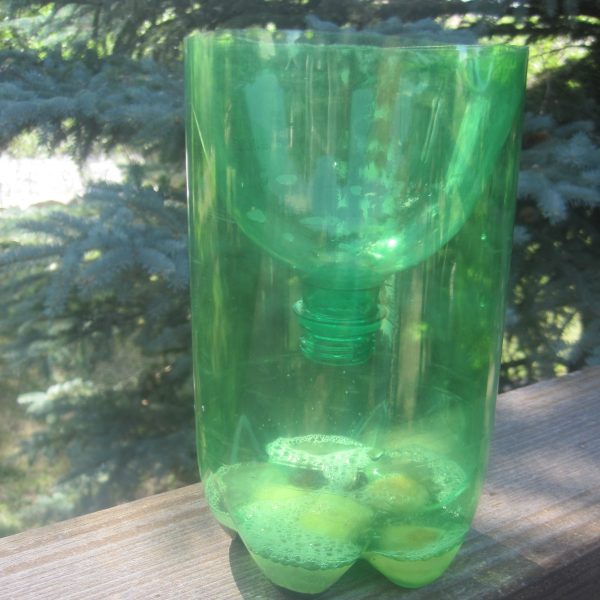
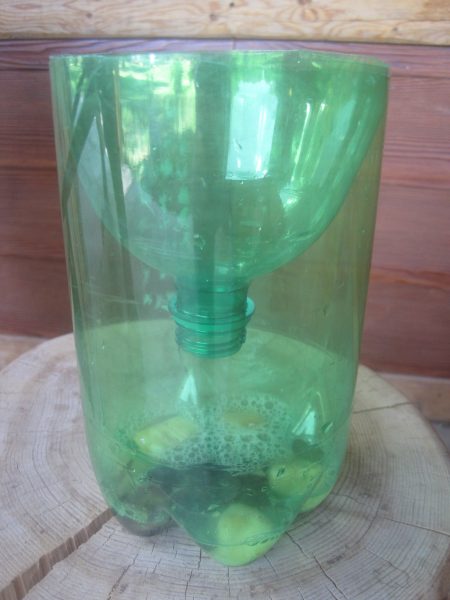
- Now, remove the bottle cap and turn it upside down. Position it inside the other section of the bottle (as seen in the image below).
- Firmly secure the two halves of your fly trap with packing tape. I did not have to use the packing tape, as the inverted top fit pretty snugly inside the bottom of the bottle.
Type of Bait to Use:
The common fly usually hovers over sweet food, fresh produce, or something rotten.
Here are a few suggestions to get you started:
- Old fruit, such as banana slices, strawberry halves, or apple chunks, is useful.
- Overripe fruit is better than fresh fruit.
- Use sugar water or honey water.
- Raw meat, like hamburger.
- Fruit juice can also be used.

That’s it! Now, place it near a vegetable patch, on the edge of the patio, on your windowsill, or in the chicken coop, tack room, or barnyard.
The best places are those that are open and where you get lots of annoying flies. If you’ve got a big backyard, chicken coop, barn, tack room, feed room, and garden area, then making more than one fly trap is a good idea.
Or, better yet… make one for each individual area.
If the thought of having this simple flytrap in your home seems nasty to you, then consider using this vintage style of sticky fly ribbon!
Basically, the trap works like a sweet-smelling funnel—it attracts the flies and never lets them get out again.
Here is a preview of what happens:
- The pesky pest flies down the funnel to taste the bait.
- It struggles to get back up and fails.
- It usually flops into the bait below, where the dish soap clings to its wings.
Voila! You’ve captured a bunch of flies with a single homemade fly trap.

Wrapping It Up:
Making a flytrap is easy. You only need old fruit or a little apple cider vinegar, so it’s natural, organic, and safe.
These simple steps let you turn this into a fun DIY project for your kids during summer. How cool is that?
If you still have some flies buzzing around, the best way to get rid of them might just be a fly swatter!
You May Also Be Interested in……
If you don’t have time to make a homemade fly trap, check out this fly plus other insect traps on Amazon!
If you have a chipmunk problem in your garden, here’s a simple, natural way to keep them away! Also, for more natural pest control tips, learn how to control aphids!


Thanks for the plans for this. I just got chicks and I know I’m going to need this near the coop!
These Simple Fly Traps are so easy to make and so cost effective that you can set several of them around your coop area. And, if you need a Quick Baby Chick Checklist Printable, make sure print off a copy. The best to you & your flock. Thanks for writing!
I just made a big . Bottle for the patio! I sat it down and flies came to it. I put syrup in the water and dish soap!! Then circled the top with syrup to make sure they could smell it.
I then took two water bottles and made two smaller ones for the kitchen. Thank you for sharing how to do this. Do you know how often it needs to be changed out.?
GENIUS!!!!
I’m a little confused about the “starter hole” mentioned in Step 3… because later you just remove the cap entirely. Am I missing something? Do we still poke a hole somewhere…? Sorry to sound dumb…I have a TBI so maybe I’m missing something obvious! LOL
Hi, by keeping the top screwed on the bottle it makes it easier to poke the starting hole in the side of the bottle without squishing it! The air inside the bottle helps it hold its shape while making the slit in the side. Once you have poked a hole or made a slit in the side of the bottle, cut the bottle into 2 pieces using scissors or a serrated knife. Now, that you have the 2 pieces, continue with the next steps by adding the “bait” in the bottom section and then taking off the cap of the top section of the bottle. You will then insert the top section into the bottom section like in the photo. Hope this helps! Thanks for writing!