Tips for Raising Baby Chicks for Beginners

Chicks and chickens are a fun addition to your farm or backyard!
Baby chicks need little space when they are young, but they will grow and eventually require adequate floor space in a coop and safe outdoor areas. Find out more on how to start baby chicks and adjust their living space as they grow.
RAISING CHICKS and CHICKENS:
Before getting baby chicks, you need to prepare:
- 1. Get the brooder ready for the chicks.
- 2. Select suitable bedding for comfort and cleanliness.
- 3. Make sure the temperature in the brooder is just right.
- 4. Set up water containers for the chicks to drink.
- 5. Get starter feed for young chicks and grower feed as they grow.
- 6. Stay alert for any problems that may arise.
Start with day-old chicks in a safe, warm brooder. You will have a few weeks to get the henhouse and yard ready for them as they grow. A useful book is Fresh Eggs Daily: Raising Happy, Healthy Chickens…Naturally.
Before deciding to keep chickens:
- Check if it’s legal to own chickens where you live.
- Learn the basics of feeding and housing chickens.
- Make sure you have enough space and shelter for your chickens.
- Think about how much time you can dedicate to caring for your poultry.
- Consider how much money you need to begin.
- Look into the potential market for selling poultry products.
#1 GETTING STARTED…ordering chicks!
Once you confirm that you can keep poultry in your area, think about the important points mentioned earlier. If you decide to raise birds, start by planning how and why you want to do it. I have learned useful tips over the years about raising baby chicks and chickens.
First, decide how many birds you want and what types. This choice can change over time, so it’s wise to start small and expand later as you can.
Types of Baby Chick Orders: Pullets, Cockerels or Straight-Run
- Pullets are female chicks or young hens.
- Cockerels are male chicks or young male chickens.
- Straight-run means ordering chicks as they hatch.
- Straight-run orders typically have 50% males and 50% females.
- All pullet chicks are more expensive than baby chick orders.
- Straight-run orders are less expensive for your chicks.
- All cockerels are the least expensive type of baby chick to order.
ORDER FROM A HATCHERY:
There are several ways of starting a small farm flock. One way is to order day-old chickens from one of many hatcheries around the country. The little chicks are flown to your local post office within three days of hatching.
When our children were young, we ordered baby chicks through the mail. It was such an exciting day! The chicks arrived in a peeping frenzy but soon settled down once they had warmth from the heat lamp, chick starter, and water.
I like to use a hatchery in Idaho, as it is closer to us than the ones in the Midwest. So, do a little research on hatcheries close to you if you decide to order baby chicks through the mail. Each hatchery’s website will have their special instructions on caring for baby chicks.
Here is a great website for Dunlap Hatchery. You can research many of the top breeds of chickens and determine the best variety for your needs.
Mail-order chicks have been available for decades; this is a very safe and efficient way to order day-old chicks.

PURCHASE BABY CHICKS LOCALLY:
- Some feed stores sell chicks. If they don’t, ask if they can order them in the spring.
- You can also find laying hens on Craigslist or at local farm stores. People sometimes sell extra chickens when they reduce their flock.
- Make sure to check the age, breed, and sex of the birds, and ask about any bad habits or health issues.
- Specifically, ask if any of the chickens eat eggs. You want to avoid that problem.
- Egg eating is a serious issue, especially if you plan to sell your eggs for profit.
#2 THE BROODING:
Plan a safe space for your chicks, keeping them away from drafts and dampness, especially from the ground. You can use dog carriers, cardboard boxes, or water troughs as brooders.
You can get creative with what you have at home to make your chicks comfortable, or you can buy a kit like the Chicken Ware Chick-N Starter Kit.
Even if you’re on a budget, you can build a good brooder yourself. Key items to include are cardboard walls, chick-sized waterers, chick feeders, a heat lamp, wood shavings, and newspapers.
It’s important to keep the brooder safe from rodents and drafts and to protect it from cats. Baby chicks need to be kept at 100 degrees Fahrenheit for their first week, then lower the temperature by 5 degrees each week. The temperature should be 100 degrees directly under the heat source where the chicks can reach it.
#3 BEDDING:
Insulation:
Use foam insulation, a blanket, or another protective layer to prevent cold from coming through the floor into the brooder. Cold and slippery floors can lead to crooked toes and deformed legs in growing chicks.
Woodchips or Shavings:
Wood shavings are great bedding for your brooding area. Cover the shavings with newspapers for the first few days to help chicks focus on their feed instead of pecking at the shavings. Change the newspapers every day.
Textured Rubber Shelving:
It is also an excellent idea to cover any type of bedding material with textured rubber shelving. This shelving is easy to keep clean and helps reduce the slipperiness of just the newspapers. The shelving can be easily rinsed off with water.
The water fountains and feeders are kept clean with the rubber shelving. This is a super helpful step!

#4 TEMPERATURE OF BROODER:
In the first week, keep the brooding area at 95 to 100 degrees. In the second week, lower it to 90 to 95 degrees.
Continue reducing the temperature by 5 degrees each week until the chicks are fully feathered at about 6 weeks old.
You can use different heat sources. We have had good results with the Reflective Heat Lamp.
Depending on your brooder size, you can use a 75-watt or 100-watt bulb. Make sure the chicks can move away from the heat to avoid overheating.
Check the temperature often with a thermometer to ensure it’s safe.
If chicks get too cold, they will pile on top of each other, which can suffocate them. Provide enough space, food, and water, and avoid corners in your brooding area, as they can lead to pileups. Keep your brooder “corner-free.” Take a look at this brooder type plate: RentACoop Chick Heating Plate—Warms 20 Chicks—22 Watts
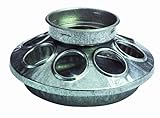
#5 BABY CHICK WATER FOUNTS:
Start with chick-sized waterers and feeders. They are cheap and can be used every year. The designs keep chicks out of the water, preventing drowning. Check out affordable fountain chick feeders and chick waterers that attach to pint- or quart-size Ball or Mason jars.
Or, take a look at this set:
Chick Waterer and Feeder Combo

As the chicks grow, consider getting larger feeders, like these:
Important Side Note on Teaching Baby Chicks to Drinks:
Chances are your baby chicks will be cold and hungry when they arrive. Chick comfort can be told by the way they sound. Loud cheeping means they are in distress. They are either cold, hungry, or both.
The first thing is to teach them to drink as you are putting them into the brooder.
To teach your baby chicks to drink, simply dip their beaks, not their nostrils, into a little saucer of water or milk. Let the chick get the idea of tipping its little head back to swallow. It only takes 1 or 2 times of dipping their beaks before they understand and can then drink on their own.
If your baby chicks arrive chilled or in distress, mix up warm canned milk and a little sugar. Dip each of their little beaks into the milk & sugar mixture to make sure they get a drink. This not only gives them a boost of energy and food, but you are teaching them to drink at the same time.
The recipe is 1/4 cup of canned milk and 1 teaspoon of white cane sugar. Mix and place in a shallow dish or bowl. The bowl needs to be shallow enough to allow you to easily dip the baby chicks’ beaks into the mixture.
Chicks are a great way to teach responsibility to children, especially little ones. Children love helping the little chicks learn to drink by dipping their beaks into water.
The Backyard Homestead Seasonal Planner:
What to Do & When to Do It in the Garden, Orchard, Barn, Pasture & Equipment Shed

#6 POULTRY FEED:
At this point, you will want to consider your options on types of feed: organic vs. non-organic. Both have pros and cons. There are many, many companies that make poultry feed, so do a bit of research on the internet and at your local farm and ranch store, feed store, or hardware store to see your options.
Feeds: Chick Starter, Lay Mash or Pellet Feed, and Chicken Scratch are all available in organic and non-organic forms.
- The starter is fed free-choice for the first 6 weeks. Chick starter is usually in what is called a “mash” form, meaning it is finely ground.
- Grower is fed from 6 weeks until the young pullets begin laying. Chick Grower can also be in a mash form or a crumble, which has a little more texture than mash.
- Lay Mash or Lay Pellets are fed once the young pullets begin to lay.
I like feeding my laying hens pellets, as I feel it is more cost-effective, as not as much feed is wasted as the hens peck through it.
Organic and Non-Organic Feeds:
I used organic feed that has no additives, herbicides, or pesticides and is non-GMO, but it usually costs more. Non-organic feed is cheaper and easier to find. You need to think about what you prefer and what matters most to you.
Chick starter and grower feeds can be medicated or non-medicated. The medication is not approved for meat chicks but is safe for egg layers. Decide if you want to use medicated feed or you can add an electrolyte / vitamin mixture to their water.
DO NOT FEED MEDICATED FEED TO DUCKLINGS!
As a Side Note: Chickens Love to Forage
Chickens are great foragers and will eat leftover vegetables, greens, and squash from your garden. They also enjoy leftovers from your fridge.
The only food I’ve found that chickens won’t eat is citrus rinds and they should not eat junk foods. Otherwise, they seem to love everything, especially watermelon, zucchini, and pumpkins!
You May Also Enjoy:
#7 POTENTIAL PROBLEMS
There are a couple of areas that can cause potential problems for baby chicks:
A. Coccidioidomycosis is caused by a parasite that can lead to diarrhea in baby chicks, which can be dangerous. It’s good to keep a coccidiostat on hand for safety.
B. Pasted vents happen when poop sticks to a chick’s vent. Don’t pull the dried poop off; there’s an easier way.
Just rinse the area with water and dry it before putting the chick back in the brooder. Pulling off the poop can hurt the skin, which is harmful. Other chicks might peck at any blood, causing more issues.
Rinsing with water or using a damp cloth is safer. Also, consider adding an electrolyte mineral supplement to the chicks’ water for the first six weeks.
C. Mud on Toes is just poop stuck on baby chicks’ toenails. Keep the brooder litter dry because water mixed with chick droppings can build up on their toenails. If you notice this, gently soften the mud clump to clean it off.
# 8 THE NEXT STEP
When you reach the point of having your baby chicks all set up in their brooder, you will know that are content by happy peeps. Now, it is time to hop over to TOP TIPS for RAISING CHICKENS for the next steps as they grow!
This post will cover your laying hens and poultry flocks housing needs as well as floor space, nesting boxes, waterers & feeders, shelter and protection.
Backyard Chickens-Beyond the Basics

For a wonderful overview on keeping chickens and everything else “Country”, take a look at: The Encyclopedia of Country Living, 40th Anniversary Edition

This is my favorite book. My copy has “feathered” edges because I’ve read it so much!
In Summary:
Raising chickens takes effort, but it can greatly improve your farming experience. Collecting eggs from the nesting boxes feels like finding treasure.
There is a lot of information about chicken feed, some of it quite technical. Learn as much as you can, but don’t feel overwhelmed. Raising chickens can be a lot of fun! Starting on your journey as a poultry keeper is pretty easy and straightforward!
I can’t wait for you to try collecting eggs yourself; it will show you how rewarding it is!

Pin It for Safe Keeping! ♥
Baby Chicks and Chickens are a wonderful investment for any backyard, farmstead or homestead!!!!