Gardening Grow Bags & Growing Pouches are Fabulous!

Dirt bag or grow pouch (also called bag gardening) is ideal for small-space gardens. Gardening grow bags can be grown on a sunny balcony, porch, walkway, rooftop, or in the yard.
Growing in a dirt bag requires no special garden equipment or tools and the bags or grow pouches can produce an abundance of fresh produce.
Growing Bags for Easy Gardening
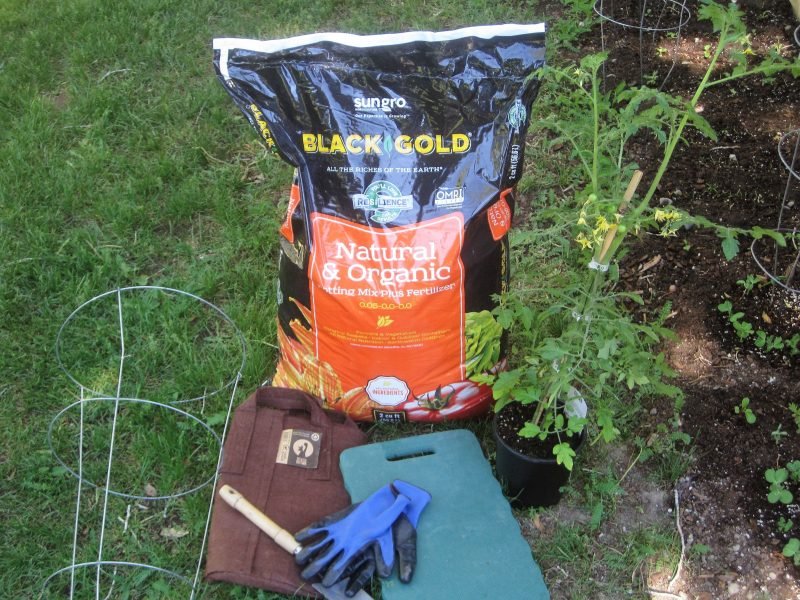
There a couple of ways to do this. One method is to simply buy actual bags of potting soil for creating and successfully growing food right in the bag of soil.
The other method is to fill a reusable “cloth” growing bag for this small portable gardening technique. Either way is totally acceptable.

Reusable Cloth Grow Bags
I happen to love the idea of garden grow bags especially since they are reusable and are much easier to move than a 40 pound sack of potting mix. These “dirt bags” can be easily emptied, folded up and stored away for next year.
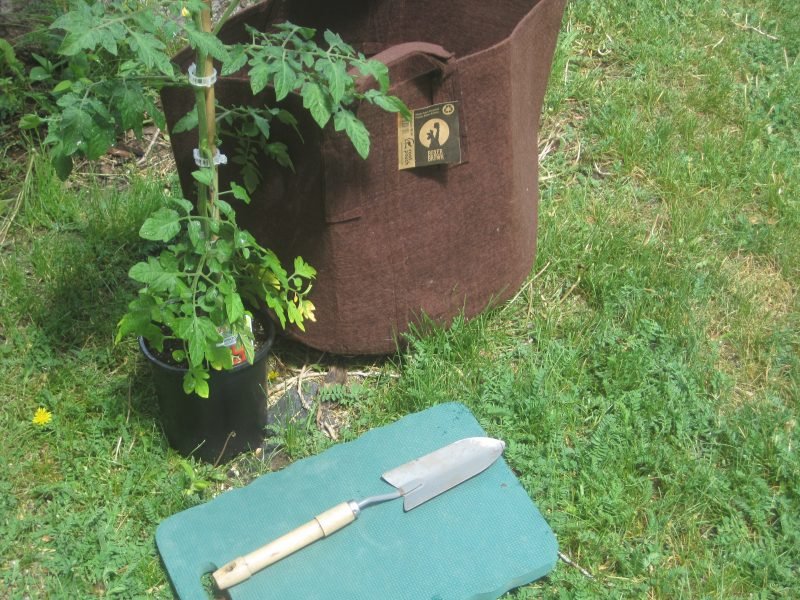
The one pictured below is a 15 gallon Boxer Brown root pouch W/H (with handles). These are made from recycled plastic bottles.
The large size makes it perfect for either a tomato plant, pepper plant, garlic or even a zucchini.
There will even be enough room to plant some leafy greens or spinach around the outer edge!
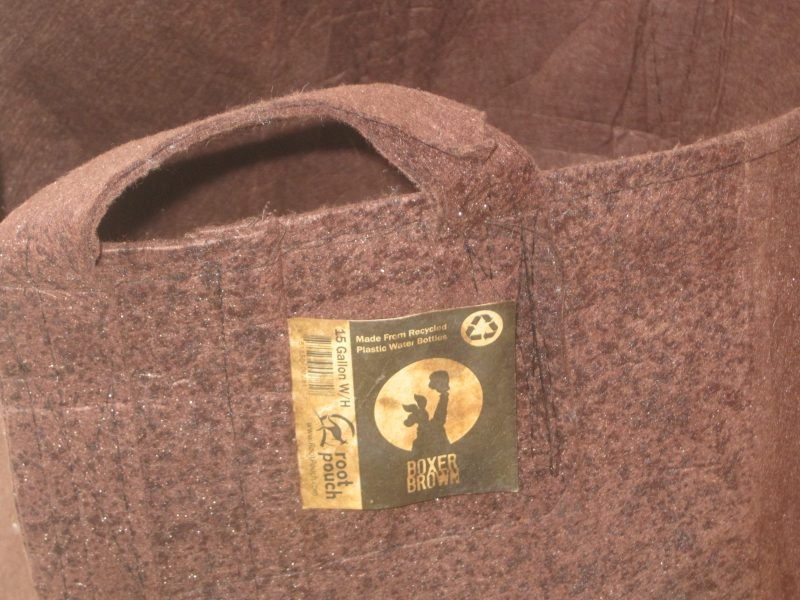
Unlike pots and containers, growing sacks or pouches do not take up much storage space. So, for those that are limited on growing space and storage space, these are ideal. (plus, many of these bags have handles so they can be easily moved to sunnier locations during the day or moved indoors if there is frost danger.
Air Pruning
Oh, one more super cool thing that I have learned is that grow bags cause the plants to be self-pruning. This is interesting!
Think about it, in pots and containers……plants send out their roots into the soil but when the roots hit the edge of the pot, they follow that surface around and around looking for a way to continue growing.
This is what causes plants to become “root bound”. The roots have nowhere else to go so they keep growing in the available space.
Grow bags are made with permiable material which allows for air transfer. The roots actually stop growing when they hit the air so they continue growing in the moist rich soil.

Bags of Potting Soil
Okay, now let’s segue into growing in actual sacks of potting soil so if you do not have a cloth growing bag then just get a bag of dirt from Home Depot, Lowe’s or your local hardware store.
Proper Drainage
The idea is the same either way! Just make sure to follow the directions listed below. It is super important to poke the holes in the bottom of the plastic bags of dirt.
The holes will provide proper drainage so your bag garden does not become waterlogged.
Growing in Actual Bags of Top Soil
Buy Bags of Soil
Topsoil is great to use for bag gardening, so are bags of soil mixes that contain compost, manure, and other organic ingredients.
Stay away from bags of sand and gravel river bottom unless you just need filler dirt. River bottom soil has been depleted of nutrients and is essentially sterile.
Place Bags in the Sun
Food-producing plants need at least 6-hours of direct sunlight every day – more is better – so place the bags flat on the ground in the sunniest location possible.
Decide where you want your small bag garden and lay the bag of soil flat on the ground. Make sure to pick the correct spot as these bags of dirt will be super heavy and akward to move once they have been watered.
Location of Your Bag Garden
You don’t have to worry about removing grass or weeds if the bags are placed on the ground. The bags of dirt will smother whatever is growing under them.
But, also remember, that they will kill the grass underneath them so do not place in your lawn. A gravel driveway or walkway is actually quite perfect as these types of areas will provide excellent drainage for your new garden.
If bags are placed on a wooden deck or porch, or a concrete area, make sure to put something under the bags, like recycled cardboard or carpet scraps, just to protect the surface from moisture or possible staining.
Begin Planting Your Gardening Grow Bags
Cut Bags Open
Use a sharp knife to cut out a large, rectangular hole in the top side of each bag. Leave the sides and 2-inches of each top edge intact to keep the soil from spilling out and to help retain moisture.
Poke at least a dozen small holes in the bottom of the bag (poke through the dirt in the bag) with a knife to create plenty of drainage holes. Large plant roots will use these holes to grow down into the soil below the bags.
When using dirt bags to grow plants on a hard surface, select plants that produce shallow roots. These are best since the roots will not have access to soil under the bags.
Vegetables like radishes, lettuce, kale, eggplant, peppers, green onions, squash, and cucumbers will grow fine in dirt pouches placed on a hard surface.
Plant Dirt Bags
If the bags are filled with just dirt (no added organic matter or fertilizer) sprinkle your favorite organic fertilizer on top of the dirt; and mix it into the dirt before planting.
Use seeds or seedlings to plant the dig bags; then plant in the same way as you would plant an in-ground garden. Space seeds or plants as recommended, lightly cover with soil and water.
Keep soil in the dirt pouches moist until seeds germinate or seedlings take root. Above-ground dirt bags will be hotter and dry out faster than surrounding soil, so keep bag garden diligently watered. The grow bags may need to be watered twice a day during the heat of summer.
Benefits of Planting in Potting Soil
Pest-Free and Weed-Free
Growing in a dirt bag or grow pouch solves two major garden problems – garden pests and weeds. Damaging pests from the soil like snails, slugs, and cutworms, rarely infiltrate bag gardens as bagged soils and planting mixes are pasteurized to kill weed seeds.
But, if you should see some unwanted pests, take a look here on how to deal with garden pests. Make sure to scroll to the bottom of the post to find the DIY Homemade Pest Spray. This is a super easy to make, non-toxic and extremely cost effective! Win-Win-Win……I love those odds!
Recycle Dirt
At the end of the growing season, the nutrients in the soil of the bag garden will be depleted; but the used dirt can be recycled. Empty the bags of used dirt into the compost bin or use it as filler dirt in new planting beds.
Half of the soil can be removed from the grow pouches and replaced with compost. It will now be refreshed and ready for a fall garden. Mix the compost in with the soil and plant some fall vegetable crops; kale, cabbage, collards, mustard, beets, radishes, and onions are all cool weather crops like shown below.
That’s a Wrap…..on Gardening Grow Bags!
No matter where you live, these gardening grow bags or grow pouches will work out well for you! These are both really great and inexpensive ways to get fresh, organic food into your daily diet.
Plus…..do not stop with just the summer growing season: consider the following for year round fresh herbs, lettuces and greens!
Gardeners just have a super difficult time keeping their hands out of the dirt! ♥ So, here you go with some year round indoor gardening ideas, too!!!
For the Love of Gardening!