HOMEMADE CANDY DROPS | Easy & Fun Recipe
These honey-lemon-ginger candies are made from all-natural ingredients. They are soothing and tasty.
These four unique ingredients create a soothing candy for families who like to make things at home. I love that these honey-lemon drops are a homemade treat that everyone in the family will enjoy!
You can give a healthy treat without using artificial ingredients since you control what goes in! These homemade candy drops are much better than store-bought ones.
How to Make Homemade Candy Drops
You won’t need to grab artificial candy when you have one of these nearby. Most of the ingredients are likely already in your kitchen.
Here’s what you need to do:
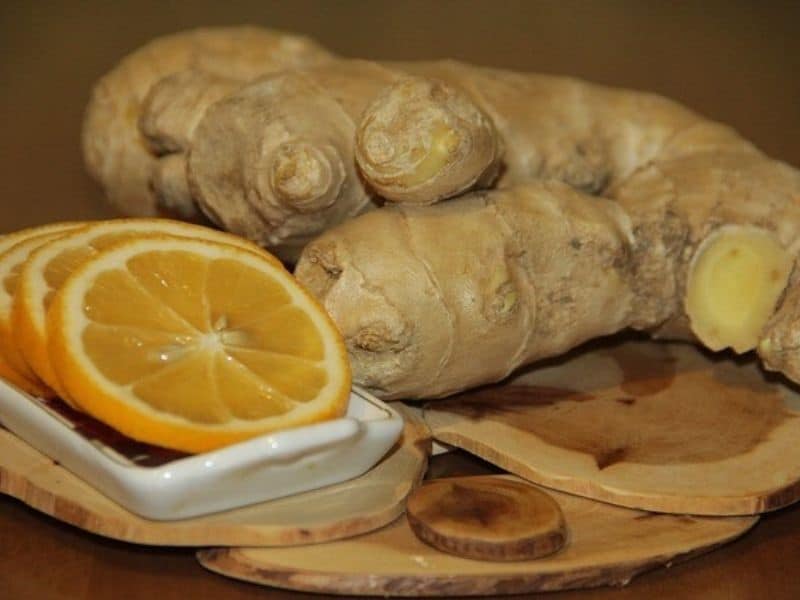
Ingredients
- 6 tbsp of honey
- 2 tsp of freshly squeezed lemon juice
- 2 tsp of coconut oil
- ½ inch of ginger (freshly peeled and grated)
- Powdered sugar to dust the candy drops prior to storing (optional)
Grate the fresh ginger using a small grater. Ginger has a strong flavor, so use less for young children or anyone who is sensitive to it.
Method:
- Take a small pan or 6-inch cast iron skillet and add your ingredients together.

Let the mixture melt over medium heat.
Take the pan off the stove once the mixture starts to boil. Then whisk until the bubbles start to decrease.

Heat the mixture again for 3-6 minutes until it reaches 300 degrees on a candy thermometer. This is the “hard crack” stage for making hard candies.
If you don’t have a candy thermometer, that’s okay! I don’t have one either. Just read the information below before starting your candy drops; it will help you a lot.
The Cold Water Candy-Making Test
- Stop cooking when your mixture darkens.
- Let it cool for a few seconds, then drop 1/2 teaspoon onto parchment paper.
- If the mixture gets too thick, gently reheat it on the stove to soften it.
- Slightly reheating the mixture will help ensure the candy drops are easier to make.
- Leave the parchment paper with the candy drops on the counter to cool completely, or place it in the refrigerator to set.

Or, pour it into an ice tray
(preferably molds made from silicone or silicon sucker molds.)
- Don’t overfill the molds, or the candy drops will be too thick.
- Let them cool for at least 60 minutes.
- If you like things to be even, use silicone molds.
- If you prefer a handmade look, pour from a spoon to make free-form drops.
- Free-form drops end up in different sizes, so you can pick the exact size or shape you want!
You May also enjoy:
- Helpful Old Fashioned Practices that are Used Today
- Thieves Oil Recipe: Homemade All-Purpose Essential Oil Blend
- Delicious Lemon Balm Tea & Its Amazing Health Benefits
Storing Your Healthy Candy Drops

Dust with powdered sugar if desired to help your homemade drops from sticking together.
That’s it! Your naturally sweet and soothing homemade drops are ready to use. You can save them for weeks by keeping them refrigerated or in the freezer. I like storing them in these little stainless steel containers.

Directions:
Slowly dissolve in your mouth. Make sure to suck and not chew these drops. These homemade candies are a sweet treat. It is all about enhancing the power of fresh ingredients. Unlike store-bought tonics and candies, these drops don’t have any chemicals.
Let’s have a look:
- From the Mayo Clinic – honey soothes your itchy throat by coating it with its warm goodness.
- Benefits of Lemons from WebMD – lemons add wholesome nutrients into your diet
- Coconut oil and its benefits from Very Well Health
- NIH on how Ginger reduces nausea
Some over-the-counter candy drops can upset a sensitive stomach. The ginger in these homemade candy drops helps soothe the stomach.
Always check with your healthcare professional before using any homemade remedies.
Homemade Lemon Drops | Easy & Fun Recipe

Homemade Honey and Lemon Candy Drops
Ingredients
- 6 tbsp. of honey
- 2 tsp of freshly squeezed lemon juice
- 2 tsp of coconut oil
- ½ inch of ginger (freshly peeled and grated)
- Powdered sugar to dust the candy drops prior to storing (Optional)
Instructions
- Take a small pan or a 6 inch cast iron skiller and add your ingredients together.
- Let the mixture melt over medium heat.
- Take the pan off the stove once the mixture starts to a boil. Then whisk until the bubbles start to decrease.
- Put back on heat and continue doing this for 3-6 minutes or until it reaches 300 degrees on a candy thermometer which is the "hard crack" stage when making hard candies,
- Stop cooking once your mixture starts to darken.
- Let mixture cool for a few seconds and then drop by 1/2 teaspoon on parchment paper.
- If the mixture becomes to thick while making the individual drops, simply place the skillet or pan back on the stove to gently reheat. This will soften the mixture to make it easier to finish making your candy drops.
- Or, drop by 1/2 teaspoon on parchment paper.
- Don’t fill the molds too full or the candy drops come out too thick.
- Set it aside to cool for at least 20 minutes.
- Dust with powdered sugar if desired.
- Pop it in the refrigerator to set.
Method
That’s it! Your sweet and soothing homemade cough drops are ready to use. You can save them for several weeks by keeping them refrigerated or in the freezer. I like storing them in my little stainless steel containers.
Notes
Directions: Slowly dissolve in your mouth and enjoy the homemade candy sweetness. Make sure to suck and not chew these drops.
Nutrition Information
Yield
14Serving Size
1Amount Per Serving Calories 68Total Fat 1gSaturated Fat 1gTrans Fat 0gUnsaturated Fat 0gCholesterol 0mgSodium 1mgCarbohydrates 16gFiber 0gSugar 16gProtein 0g
Nutrition information isn’t always accurate due to variations of ingredients used in recipe.
Printable Recipe
Homemade Lemon Drops | Easy & Fun Recipe
Homemade Honey and Lemon Candy Drops
Ingredients
- 6 tbsp. of honey
- 2 tsp of freshly squeezed lemon juice
- 2 tsp of coconut oil
- ½ inch of ginger (freshly peeled and grated)
- Powdered sugar to dust the candy drops prior to storing (Optional)
Instructions
- Take a small pan or a 6 inch cast iron skiller and add your ingredients together.
- Let the mixture melt over medium heat.
- Take the pan off the stove once the mixture starts to a boil. Then whisk until the bubbles start to decrease.
- Put back on heat and continue doing this for 3-6 minutes or until it reaches 300 degrees on a candy thermometer which is the "hard crack" stage when making hard candies,
- Stop cooking once your mixture starts to darken.
- Let mixture cool for a few seconds and then drop by 1/2 teaspoon on parchment paper.
- If the mixture becomes to thick while making the individual drops, simply place the skillet or pan back on the stove to gently reheat. This will soften the mixture to make it easier to finish making your candy drops.
- Or, drop by 1/2 teaspoon on parchment paper.
- Don’t fill the molds too full or the candy drops come out too thick.
- Set it aside to cool for at least 20 minutes.
- Dust with powdered sugar if desired.
- Pop it in the refrigerator to set.
Method
That’s it! Your sweet and soothing homemade cough drops are ready to use. You can save them for several weeks by keeping them refrigerated or in the freezer. I like storing them in my little stainless steel containers.
Notes
Directions: Slowly dissolve in your mouth and enjoy the homemade candy sweetness. Make sure to suck and not chew these drops.
Nutrition Information
Yield
14Serving Size
1Amount Per Serving Calories 68Total Fat 1gSaturated Fat 1gTrans Fat 0gUnsaturated Fat 0gCholesterol 0mgSodium 1mgCarbohydrates 16gFiber 0gSugar 16gProtein 0g
Nutrition information isn’t always accurate due to variations of ingredients used in recipe.
To Wrap This Up:
These homemade candies are simple to make and are so delicious! Plus, you can customize them to fit your taste.
Disclaimer: The information provided is anecdotal and is for educational purposes only.


